Hello Everyone!
Today I am going to show you these lovely pine cone Christmas trees and where I got the idea. I love the blog Sweet Something Design and I loved these cute Christmas Tree Topiaries.
www.sweetsomethingdesign.blogspot.com
Today I am going to show you these lovely pine cone Christmas trees and where I got the idea. I love the blog Sweet Something Design and I loved these cute Christmas Tree Topiaries.
www.sweetsomethingdesign.blogspot.com
I had most the supplies to start butI didn't have any foam trees. I had made some glitter covered trees last Christmas with two different sized cardboard cones. I wouldn't be using them this year so I thought what the heck these will do!
I begin cutting up the large pine cones and who knew some pine cones had little prickly things under each "petal"? This girl didn't! And some of them were sharp little guys! Also make sure you work some place where you don't mind getting pieces of pine cone everywhere like I did here:
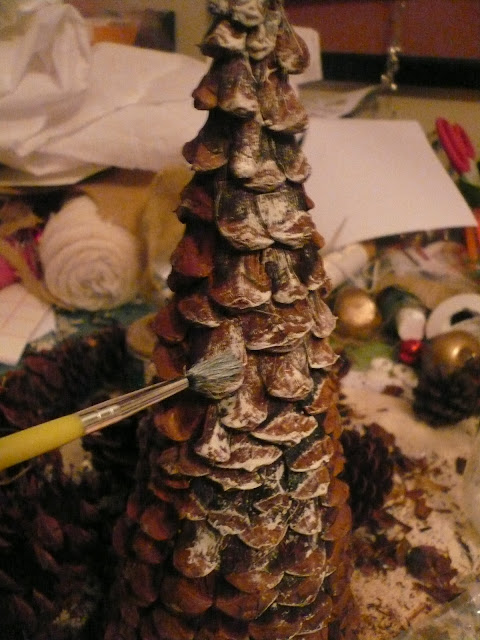
I attached each pine cone petal with a hot glue gun around the cone in a brick like fashion until I reach the top of the tree. It felt like it look me 10 hours to finish one cone because the form I was using was much bigger than the ones from Sweet Something Design. So here is what one looked like before I painted it.
I wanted mine to have a white wash on it so I used the dry brush technique and used a off white acrylic paint.
Here they are finished! I love how they turned out and I am displaying them in our office on some ceramic pedestals!
Here is a picture of the entire bookcase in our office and the wood slat piece I made this past summer which I will tell you about another day!
Thanks for stopping by!
Jessica


2 comments:
This is such a great idea! I love your blog! So sweet! Your new follower
i pinned this to my pinterest account...thanks for the great idea!
Post a Comment